How To Cut Dovetails
Dovetail joints are a hallmark of fine woodworking, celebrated for their strength and aesthetic appeal. Although they require precision and practice to master, the process is straightforward when broken down into manageable steps, and especially with the use of a magnetic saw guide!
Here's how to use the David Barron Dovetail Guide to cut dovetails, as demonstrated by David Barron himself at the London International Woodworking Festival 2024.
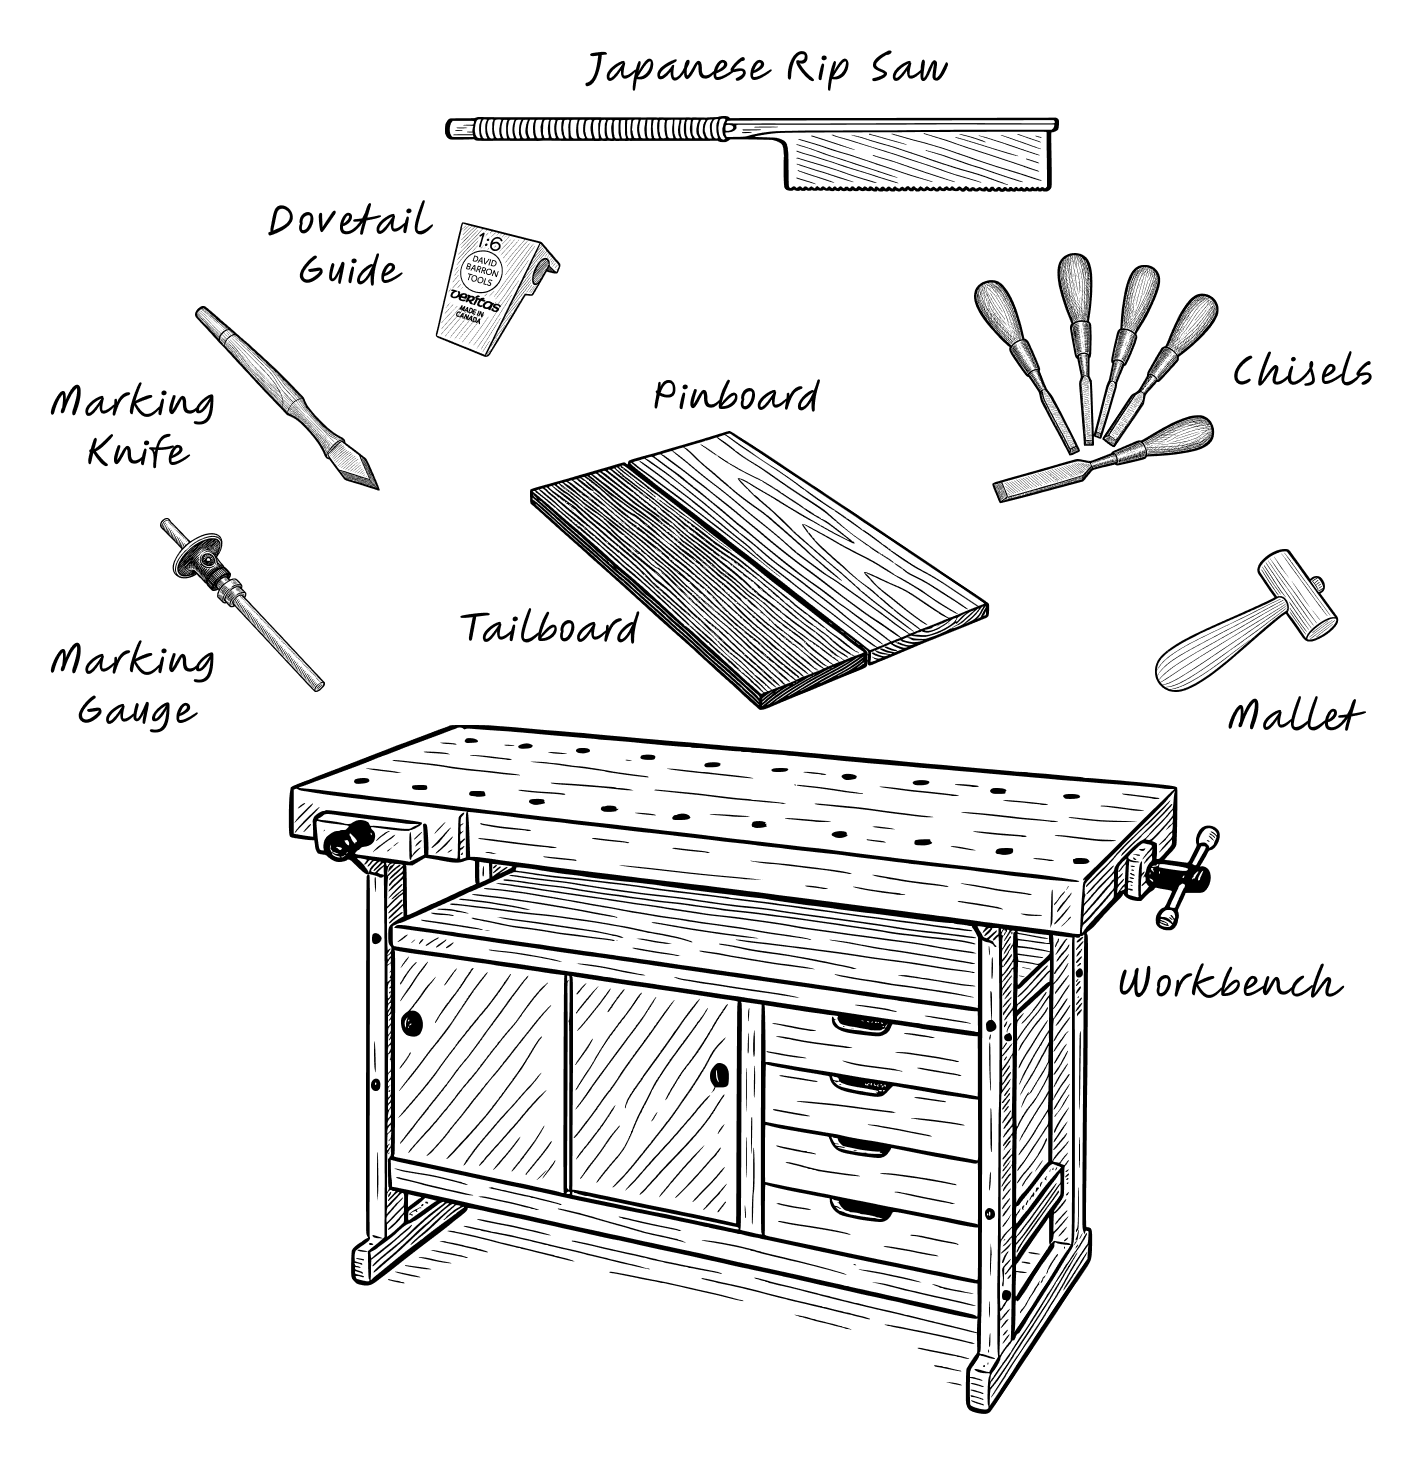
Tools and Materials Needed
-
Wood pieces: Two pieces of wood, one for the tailboard and one for the pinboard
-
Dovetail saw: A Gyokucho Razorsaw Dozuki Rip saw is recommended by David
-
David Barron Magnetic saw guide: To assist with straight, accurate cuts
-
Chisels: Sharp chisels of varying widths
-
Marking gauge: To scribe lines accurately
-
Marking knife: For precise layout
-
Mallet: For chisel work
-
Workbench & Vice: A sturdy work surface is needed
Step 1: Prepare the Wood
Ensure both pieces of wood are flat, square, and of equal thickness. Sand or plane them if necessary. The tailboard will house the tails, and the pinboard will house the pins.
.png)
Step 2: Mark the Baseline
Using a marking gauge, scribe a baseline across the width of both boards. The baseline should match the thickness of the mating piece of wood. This line marks the depth of the dovetails and pins.

Step 3: Layout the Tails
-
Place the tailboard in a vice.
-
Mark the desired number of tails on the end grain. Evenly space them for a balanced appearance.
Step 4: Saw the Tails
-
Hold the magnetic saw guide securely against the tailboard. Using a dovetail saw, follow the marked lines to cut one side of the tails.
-
Flip the tailboard and repeat the cuts for the other side of the tails. Decide on spacing and ensure consistency for a balanced appearance.
-
Turn the tailboard on its end to cut off the end waste. Use your thumbnail as a fence to cut the waste close to the line. Chisel into the gauge line at 90 degrees to the corner. Repeat for the other side.
Step 5: Remove the Waste
-
Use a coping saw to remove most of the waste between the tails. Guide the untoothed edge of the saw into the cut, allowing the saw frame to fall naturally as you cut across.
-
Clean up the remaining waste with a sharp chisel, working carefully to the baseline.
-
Firstly, cut the corners to make them sharp.
-
Secondly, chisel into the gauge line at 90 degrees, tap, then tilt the chisel to create a slight undercut.
-
Step 6: Transfer the Tail Layout to the Pinboard
-
Clamp the pinboard into the vice, with the top just proud.
-
Align the tailboard flush with the pinboard.
-
Use the tailboard as a template to mark the pin positions on the pinboard. Hold the tailboard firmly and use a marking knife to provide the most accuracy.
Step 7: Cut the Pins
-
Secure the pinboard in a vice.
-
Use the magnetic saw guide in the reverse position compared to its use on the tails. Hold it firmly to the pinboard.
-
Saw along the marked lines for the pins, just kissing the line on the inside of the waste area. Take extra care to ensure precise cuts, as pins are generally narrower than tails.
Step 8: Remove the Pin Waste
-
Use a coping saw to remove the bulk of the waste between the pins.
-
Chisel carefully down to the gauge line, tapping gently to ensure precision. Tilt the chisel slightly to create an undercut, and then clean out the corners for a sharp and accurate finish.
Step 9: Test the Fit
Gently test the fit of the joint. The pieces should slide together snugly without force. If the joint is too tight, pare down high spots with a chisel. If gaps are present, assess whether they’re acceptable or if the joint needs to be redone.
Tips for Success
-
Practice on scrap wood: This helps build confidence before working on your final project.
-
Keep tools sharp: Dull tools make clean cuts difficult and increase the risk of mistakes.
-
Work methodically: Rushing leads to errors. Take your time to ensure precision.
Mastering the dovetail joint requires patience and practice, but the result is a strong and beautiful connection that showcases your woodworking skills. With these steps, you’ll be well on your way to creating professional-quality dovetail joints.
Products featured in this article


